Showing posts with label in and out link party. Show all posts

Monday, November 24, 2014

Craft and surreptitious maths investigation!

Maths card
It was Sunday at 1pm and we had to be at my sister's for 2pm for my niece's 5th birthday party, half an hour drive away.  Problem was, I hadn't made her a card and UNDER NO CIRCUMSTANCES would a bought-card be tolerated in that household, my sister would be really disapproving/disappointed in me as would I. In myself, I mean.

Thus, I decided to do create a quick fun card I had been thinking about as an idea for a card that children could make for their friends' or relatives birthdays.  It would be a sneaky fun way that parents could get their children to do some maths investigation,  whilst having craft/making fun.  It was based on something that my Father-in-law and Brother-in-law write in cards to each other.

The idea is, you take the age of the recipient and try to make that number in as many ways as possible.  This of course will vary, based on age.

To support your child doing this of course, particularly if they are younger, you can provide cubes or marbles/multiple objects. 5 for very young children (just addition) or 10 or just a whole bag, so they can count out the objects to make the sums.

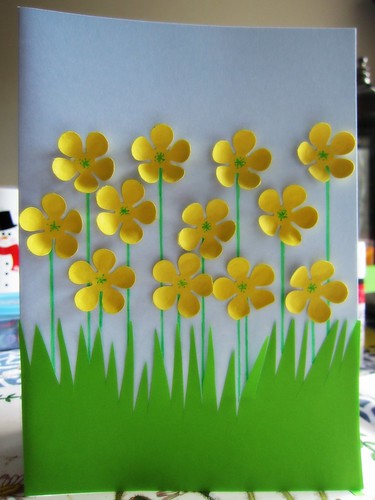
Image from TTS group

You can choose to use one operation, e.g. adding or all four: multiplication, division, addition and subtraction.  Fractions or decimals could be involved for Year 4-6 children (8-11 year olds)

You will need to make it fun then by providing either a set of wonderful coloured pens (CBC has these delicious Staedtler fineliners that I used) OR you could use number outline stickers OR  stamps OR funky-foam numbers

Staedtler 10 Piece Triplus Fineliner Pen Set
Staedler fineliners from Hobbycraft*
Hobbycraft Clear Stamp Bold Alphabet & Numbers 36 Pack
Clear Stamps from Hobbycraft*

Outline Stickers Small Numbers Silver
Anitas outline stickers From Hobbycraft*

Hobbycraft Glitter Alphabet Stickers Tub
Yep, also from Hobbycraft*- pretend they are numbers...

Once you have sourced your 'fun element' then get said child to try and find ways to make the number. (might want to try on scrap paper first)  As you can see, I tried to make mine in a way that my 5 year old would understand.  Don't forget encouraging/leading/extending words such as 'How about trying to combine more than 2 numbers?' or 'What about subtraction?'
Maths card

For even younger/lower-developmental stage children, you could just get them to draw/stamp five objects together, e.g. 5 hearts, 5 stars, 5 footprints.

To finish mine off, so it didn't look SO much like a 5 year old did it, I added gold outline stickers round the edge to give it a border and some dots.  And just so you know, I drew a HUGE multicoloured 5 inside but it was messy so you don't get to see that.

And there you have it, a card that can be made for anyone of any age, that gets your child investigating numbers along the way.  Also would make a possible man-card.  WOMOTM, My father-in-law , you know what you're getting next year....


My Father-in-law would expect something like this though... Eeek, genius child eh?!


Image borrowed from bodysmartinc.com*


Hope you like this idea.  Let me know if you try it out.

Best wishes,

Kezzie


xx


*Disclaimer:  the large number of references and links to Hobbycraft does not mean I was bribed/sponsored/endorsed/paid by Hobbycraft to write this post, I merely wanted to find a way for them not to sue me for stealing all their images by making you all go shopping there as method of appeasement! Rather like offering a goat to the gods/totem pole.

*  Disclaimer no. 2: Regretably, Bodyincsmart.com didn't sponsor me either, but go and look at all their pretty sums- maybe you can buy one to save me once again....

****


Linking to:

Monday Parenting Pin with Romanian Mum blog, hosted by

Romanian Mum

Tuesday's In and out link party with Cynthia Ladrie  at FeedingBig
In and out of the kitchen link party

You're gonna love it Tuesday with Kathe with an e


Creative Mondays with Claire Justine


Brilliant blog posts with Honestmum.com
Brilliant blog posts on HonestMum.com

The Pink Elephant Challenges "Anything goes"

and...


Tuesday, May 27, 2014

Top shaker


Bottle top snake
I have finally created a junk instrument (apart from the Smartie panpipes) that actually sounds relatively good!!!! I am a music teacher and I embrace and adore children exploring sounds they can make with anything but from a personal point of view, do not enjoy junk-instrument making on  grand-scale with lots of children simultaneously.  Whole-class junk instrument-making is usually awfully hard to teach.  It used to be a Year 5 Design and Technology project that was horrendous to teach and elicited not the best of results. The trouble is- most of the things they want to make might look cool but from a musical point of view don't make the best sound- which is surely the point of an instrument.  Ok, shakers are ok- they usually make a good -sound, BUT I've tended to find that the DT element of this seems to be, to be generally lacking- in the case of shakers- it's not really designing, it's kind of copying since I tended to find the children just wanted a quick result rather than thinking really well about the design and sound! That's fine if you just want to make a junk instrument but from a teacher having to teach DT and really covering the designing point of view- less good! The rubber-band guitars would just collapse, not be robust enough, sound too quiet to be of much use and the straw panpipes would be impossible to play unless you were a flautist like me.  There are probably good teachers who would teach this better than me and yield good results, but with 30 children having to design their own instruments, it's always just been a case of AHRGH! I think the process is a good one to try for children, I just find it hard to do with 30 children at a time!


Anyway, for anyone who'd just like to make a funky junk instrument with their kids, here's an idea:

For a while now, I've thought that plastic bottle tops, particularly those from milk-bottles had a really nice timbre when you clicked them together and have wanted to experiment with making an instrument with them.

Now, I was saving up bottle-tops to make a bottle top snake which I must have seen in the same craft-book as Ang as she posted a piccie of one and I bemoaned the fact I'd lost my stash and snake when moving and the sweetie that she is, she sent me a 'DIY Bottle-top snake kit' in the post for me to recreate it!!! I was so touched and laughed lots at the ingenious and sweet idea! However, I haven't got around to making mine yet.  But in the meantime, I nicked a few bottle-lids from the kit which I will replace, in order to try out my instrument idea in my mind.

I figured this one be a great instrument for a kid to copy and make if they wanted some sound-makers.  So, to make my BRAND NEW instrument- THE TOP SHAKER, you will need:


  • Bottle tops that are thin plastic (too thick and you won't be able to do this with my equipment)
  • A safety pin or other sharp-needled device.
  • An old biro that doesn't work anymore
  • Nice solid thread- I used cotton thread here as it doesn't unravel (it came from a charity shop)
  • A kitchen roll tube
  • Scissors
  • Coloured pens


Top shaker tutorial 2
1.  Gather about 9-10 bottle-top lids (you could choose mixed colours but I stuck to semi-skinned Green)
2.  Using a safety pin or old-biro, press the needle or biro into the middle of the top until it goes through and makes a hole (don't do on your nice tablecloth, just in case...). Do the same to all of them.
3. Now fetch a kitchen roll tube and make equidistant holes all around the circumference with a safety-pin (or needle). I supported the tube at the top with my fingers so I didn't rip it.
4.  Now get your biro and go through these holes to make them larger.
5.  Cut lengths of cotton-thread of about 15cm each, enough for each hole and bottle top.
6. Thread the cotton through the hole of the tube and then through the bottle top and tie them in a knot- double and triple up the knot.   Do the same with each one.
7.  Check you are happy with the length of the string by letting them all hang down and give a little shake. Make shorter if you wish. Trim the ends off when happy.
8. Hang downwards to check if tangled.
9. You could leave the tube blank or you could decorate like I did.  (Alternatively, it might be best to do this before you begin??? You could even cover it in wrapping paper though it'd be harder to make holes)
The top shaker finished instrument

10.  Finally, play your Top shaker to your heart's content.  Or get a band together.

Here's it in action. I like the sound- reminds me of these African seed shakers we have in school- or the sound of pebbles crashing together at the sea side!


Here are some ideas you could do with your children with this:

Get a whole party of friends together (outside preferably, to save your ears) and they can either all bring their Top shakers, other junk instruments or miscellaneous instruments and then get them to make a piece together
You might want to share some ideas to structure it to start them off to avoid them just making a racket such as a) each play a pattern or solo one at a time round the circle b) all learn certain patterns or rhythms (you could even use words for these such as 'Top___ sha-ker, Top___ sha-ker" or "Shake the, shake the sha-ker"   c) play the order backwards. d) start with one person and then all join in, one at a time when the conductor shows them, e) have everyone playing, then one person does a solo, then everyone, then someone else does a solo.
Then, you could use an app on your phone or on the computer so they can record it- they could then use Windows Movie Maker to put pictures with their recording for their 'hit'!

For more ideas for BRILLIANT junk instrument ideas, go to www.nyphilkids.org

I was really pleased with this so I wanted to share it with lots of other people!


Sharing with Creative Monday with Claire Justine


Monday Parenting pin with Romanian Mum blog  and hosted by Diary of a Frugal mum this week as I think this would be a cool holiday craft for kids!
The Diary of a Frugal Family


With Cynthia at the In and Out link party at Feeding Big

In and out of the kitchen link party


You're gonna love it Tuesday with Kathe with an e


Tuesday, April 22, 2014

FLOWER PUNCH #1 Card-making is easy!

I get lots of people saying that they wish they could make cards.  I am no artisan, my cards LOOK like an amateur has made them but I simply enjoy what I do and like to hope that the recipient is touched by the effort.  I take inspiration from magazines and pictures, but sometimes it's a case of just sitting there with some ingredients/material and tools and exploring.   It doesn't have to be expensive but you do need some tools, but so much can be done with very few. If you want to give it a go but don't want to spend loads, I recommend one product- an flower-shaped punch (this baby cuts into paper, card-stock and funky-foam)- cost about £6 at the time.

Take ONE x-cut flower punch. I bought one around 10 years ago and it has more than paid for itself in use.  You can make lots of replicas of the same card to build a stash but more often, I like doing variations.

The other components were literally:

SCRAP: 5 old birthday card envelopes I received in various shades of purple and pink, an old Pukka pad front cover, old buttons (I got mine in a Charity shop- got about 200 for £2!!!)
TOOLS: some coloured paper (again, can be remnants or scraps), scissors, PVA glue, Pritt-stick, Sticky-pads (Can be got from Poundland but glue will suffice), gel pens (can be any coloured implement).
Vase flowers
Card no.1 began from the envelope colours.  I looked in my stash box and found a piece of stripy card which was the front cover of a redundant Pukka pad I chucked out which I trimmed to just smaller than the card size.I also found a piece of blue card which I am pretty sure was once a tissue-box.    I then drew a vase template on the back and cut it out with smallish scissors.

The flowers were easy to craft- I punched 4 flowers in each of my scrap-envelope colours and laid them next to each other on a scrap piece of funky foam.
To make them 3d, you need another useful tool- an large Embossing tool (this is rather like a large tipped ball-point pen- you can see some here).  To make the petals curl, you rub them in circles with the embossing tool and the edges curl up prettily.  I then laid them on top of each other to make each flower.  Each was glued in place with a small spot of Prittstick (don't glue the petals, just the centre) and I stuck on cute little buttons (charity shop- I got about 200 for about £3!)

How I go about making the next one, particularly if the scraps are one-off (like the stripy card), I then look at the tools and what I've got and what I can make.

Flower field
Notably, in this case, I saw these very very thin strips of yellow scrap card falling out of my messy-can't-be-bothered-to-put-it-back-in-the-shed craft basket (these were left from some lettering I'd made for my display board at school and I thought they were too sunny to check and decided to make buttercups (ish)

flower 1
Having made about 20, (some you will notice, didn't quite make the perfect shape) I then cut some green paper into grass shape, drew gel-stems and stuck on.  Reminiscent of Sophie's blog post.

There were still a few left and so I had the idea to make them into a heart shape.  I made the mistake of trying to fringe the edge of the green paper to make a flat-meadow- yep, it looks rubbish- but ah well.  You can see some of the '2nds' are not quite complete flowers.  This time, a nice orange gel pen gave these centres and I drew some fake orange sticking around the edge to fill the white space.


So, really, you can see, these are really easy to make and simple.  Ok, so you might not sell them in a shop, but I am sure someone will appreciate the effort of you making them.

So, two key tools to start your card-making with are
Flower punch (x-cut are great)
Embossing tool (mine was Fiskars and came free with a magazine Subscription.

Let me know if you give any of these ideas a go, I'd love to see.

Linking to:
 Claire Justine's Creative Mondays,


You're gonna love it with Kathe with an e

In and out link party with Cynthia at Feeding Big
In and Out of the Kitchen Link Party
Feeding Big

Tuesday, December 10, 2013

Caught on Camera

Camera card

Here's a really simple card idea you can make out of very few things!

This card was made for WOMOTM, my Father-in-Law who is into photography and I imagine might make a good card for any photo-happy blogger or man of photos!

You will need: Long, thin base card in colour of your choice,Black felt-tip pen, ruler, scraps black/dark brown card (mine came from a Green and Blacks easter egg box), scraps of silvery/holographic card (could easily come from Christmas crackers or other festive metallic packaging) three medium/small black buttons, 3 small white pearly buttons, scissors and circle punch (can be done free hand), PVA glue/doublesided sellotape

1. Cut three identical small rectangles out of the back card.

2. Cut 3 circles out of the silver mirror card and stick to the centre of the rectangles.

3. Stick the black buttons centrally onto each of the mirrored circles.

4. Stick the pearly buttons on top of these (double sided sticky tape works well).

5. Cut three thin strips of mirror card to the length of your 'cameras' and adhere to the button.

6. Cut three pirate hat type shapes and adhere to the top of the camera. Draw on a little black rectangle for the view finder.

7. Stick the three completed angles at equal intervals, at a jaunty angle, along the middle of a long card.

8. Get your black felt-tip pen and draw 2 black lines close together above and below your cameras (like negatives). Draw in little thicker lines to join these at 3mm intervals.

9. Draw 2 vertical lines between the three cameras to complete your 'film'

10. Voila, finished and made very cheaply indeed! This card could cost you less then 10p if your cards were cheap!

(11. You could also add a little loop of black ribbon to the side of each camera to make handles (you could use the hanging ribbons that come in many tops or a clothing label string or wire) but I chose not to!)

Linking up to:

Creative Mondays with Claire Justine

IN and out link party with Feeding Big


Feeding Big

Tuesday, June 11, 2013

Ear candy

IMG_3457

I have a penchant for eccentric earrings.  Things that look like they should be something else.  Or something different or quirky.  My Scrabble tile earrings, Pride and Prejudice and Lego ones take pride of place in my collection.

At the Big Church Day Out back at Bank Holiday weekend, I came across a stall from a company called DIY beads who were selling beads and you could make them into necklaces and bracelets at the time.

There were all sorts of cool and fancy ones. But the ones that attracted me the most were the sweetie ones.

Pink Shrimps are one of my favourite sweets so it was inevitable I would squeak and reach for these ones instantly.   The bananas, eggs and love hearts followed in that order.  It was a simple matter to bend a jump ring and add them to it plus earring backs.  Really not really craft in my case or making but simply the opening and shutting of rings of metal! 

Thus, because I feel a bit of a cheater, here's something else I made- a card for a fellow blogger's birthday.

My sister has a really cool dress-shaped punch.  As a birthday present- she cut me a box of dress shapes in different patterned papers. What a cool idea- it cost her very little but was a huge help to me!
I layered the dresses upon 3d pads to accentuate the bottom half and then added paper-shredded strips and some punched butterflies.

IMG_3497_1

Linking up to Ta Dah Tuesday
Creative Mondays


Super Handmade Sundays with Sarah:

In and out linking party with Cynthia
In and Out of the Kitchen Link Party

Tuesday, June 04, 2013

With cat-like tread, across the seas we go

IMG_3483

You get super brownie-points if you can tell me where my blog title comes from!

Ages ago, I saw a wonderful tutorial on Kate-Gabrielle's Scathingly-brilliant blog for how to embroider your own cat shoes.  I thought this looked a great idea and decided to give it a try.   Her tutorial is here- I'd advise you to go to her blog for the proper tutorial.  This is more my own take on the experience rather than amazing original tutorial.  That would be plagiarism!!

1.  You need to find a pair of cheap flat shoes.  You could do it with heels but they'd need to be something you can pierce easily with a needle. I have looked for ages and found this pair with plimsol-like material in Asda for £6- I knew a needle would easily pass through these.
Canvas Ballet Shoe
You can find them here at Asda. They also do them in grey!

2.  Next, I drew round the front of the shoe and then drew a cat face on it.  I kept it fairly simple.  I then scribbled on the back of the paper with a white pencil and then placed it over the shoe and drew hard over the design with a medium-sharp pencil (not too sharp or it will go through the paper.).  Kate used tracing paper but you don't need to- I couldn't find any!

3.  Then you start to sew with embroidery thread (and a sharpish needle).  I chose to use biscuit-coloured thread as it was not so stark as white might be.  Kate advised that you start from the bits further inside the shoe as they are the hardest!  I had to go over the white pencil face with my white pencil a couple of times as it rubbed off a bit. I had trouble with finding where to put the needle through- it was mostly guesswork. I know of no other way to miraculously find where the needle needs to go otherwise!

4.  Finally, I decided not to go with green eyes but used pink Pebeo- 3d touch paint to colour in the nose.

5.  I intend to sew on a little pair of black felt triangles (with mini pink triangles on top) to the top to make ears at some point but right now, I think I will wear them as they are.

6.  If you decided to make a bunny version of these shoes (Asda do grey shoes), you could easily add a pair of floppy ears and then add a white pom-pom to the back to make a cute tail.

Linking to:


Sarah's Super handmade Sunday


Claire Justine's Creative Mondays
Feeding Big and more
Cynthia's In and Out link party

Lakota's Ta dah Tuesday

Monday, May 13, 2013

Note it down

Song birds

That Mahler 6 score has got a lot of use in my craft-escapades over the past couple of months- I think you're going to get bored of seeing it appearing on a ever-expanding collection of missives!
Nonetheless, it's fun trying to see how many ways I can use it!

The above card is for a family member who loves birds and enjoys listening to some classical music. I find it really hard a) buying presents for him and b) making cards for him. He's one of those typical men who it's really hard to purchase things for!  I am very pleased that CBC is not a typical man in that respect!

Anyway, I decided to combine the bird and music idea.  I wanted to try and ensure that it didn't look too girly with birds on but not sure if I succeeded or not. I used a free bird stencil from a magazine ages ago and cut two layers of birds and layered them up with 3d pads to add a little depth, rounded the corners of the card using a corner punch.  It looked a little bare so I added some quilling strips (recycled) to frame it a bit.

IMG_3308

This one made use of the origami heart technique I picked up when I made CBC's Valentines card this year but in miniature form.  I used some William Morris sample print outs that someone had printed a couple of years ago to show examples to children at school. It was a bit dog-eared and out of use so I squirreled it away for future usage. I gave it to a girl in my orchestra who plays bassoon on Saturday as she is getting married in Wales next week.  She was surprisingly touched by it and didn't realise I had made it. I'm really glad I gave it to her!  Three of us are getting married from orchestra this year, so it's nice we've been able to discuss and compare notes!


Linking to:


Sarah's Super Handmade Sunday


Claire Justine's Creative Mondays

Feeding Big and more
Cynthia's in and out linking party